Knowledgebase : Spirion Sensitive Data Scanning

How to Obtain Spirion

Spirion is currently licensed and available for any campus-provided computer. If you don't have Spirion installed, contact your Technical Support team to have it installed.

Scanning Your Computer for Sensitive Data

Addressing Discovered PII or Sensitive Data

  • Using the ignore feature
  • Shredding sensitive data
  • Scrubbing or redacting sensitive data
  • Quarantine Option - not available.
  • Secure Option - not available.  The Secure feature will encrypt the file and may only be accessed with the password set at the time of encryption. Though this feature may seem advantageous, it has its drawbacks. For example, if a user were to forget the password to the file, the data will not be recoverable.
  • Recycle Option - not available.

How to Manage Your Scanning Profile Password

The Spirion client application provides the ability to save settings, configuration information, and sensitive data across sessions through the use of a profile password

Note: It is not possible to recover a lost password; however, it is possible to delete a profile and create a new one.

When the profile password is created, that password is used to encrypt the profile. The profile password is not stored anywhere and therefore if it is lost or forgotten, then all of the information in the profile will be lost.

If you have questions about Spirion, please contact the Information Security Office via email at helpdesk@minotstateu.edu .

Additional Resources

NDUS Data Privacy Policies

Reset Profile Password

The Spirion client application provides the ability to save settings, configuration information, and sensitive data across sessions through the use of a profile password. It is not possible to recover a lost password; however, it is possible to delete a profile and create a new one. When the profile password is created, that password is used to encrypt the profile. The profile password is not stored anywhere and therefore if it is lost or forgotten, then all of the information in the profile will be lost.

Using Spirion to Delete a Profile

A profile can be deleted by logging into Spirion as a guest by skipping the password screen, opening the Profile page within Settings/Preferences (Select the Configuration menu item and then select Settings), and clicking the Delete profile button.

Managing Your Profile

Spirion uses a single master password to securely store all your personal information related to Spirion inside a Profile. If you want to delete this file and all the information contained within, press the Delete button. You can also change your password. To change the password first sign into your profile then click the Change button.

Run a scan on your computer

The first scan may take a few hours to complete. Even though the scan will run in the background with low priority not to affect your machine’s performance, we recommend starting your first scan before you leave work in the evening, then press Control-Alt-Delete, and click “Lock this computer” on your way out.

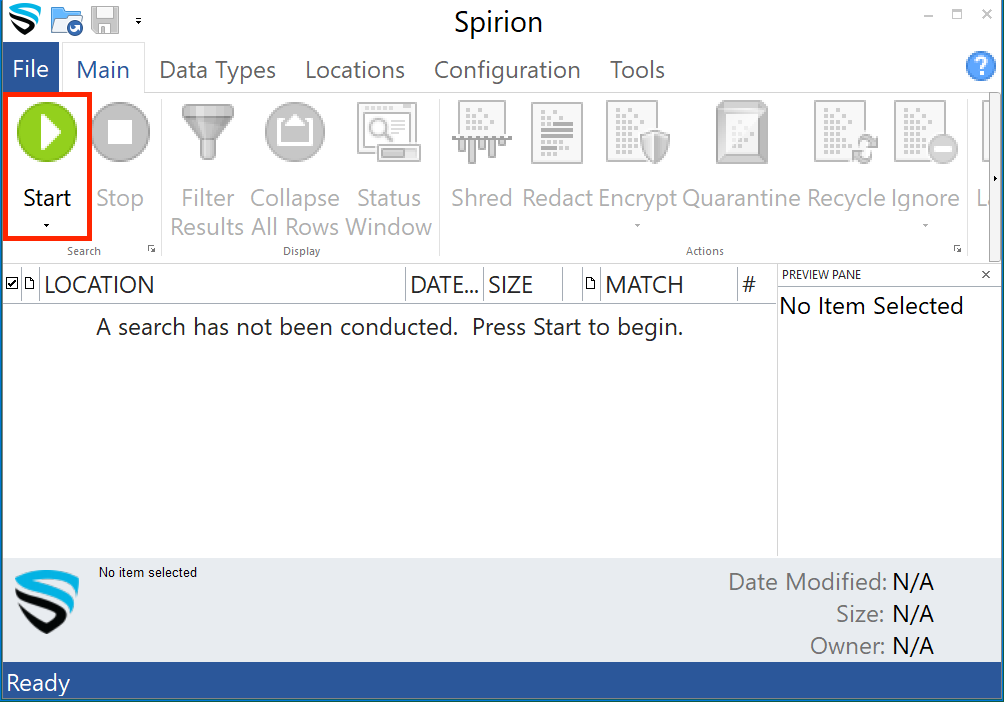
  1. To begin a scan, click the green start button located in the upper left corner of the application window.

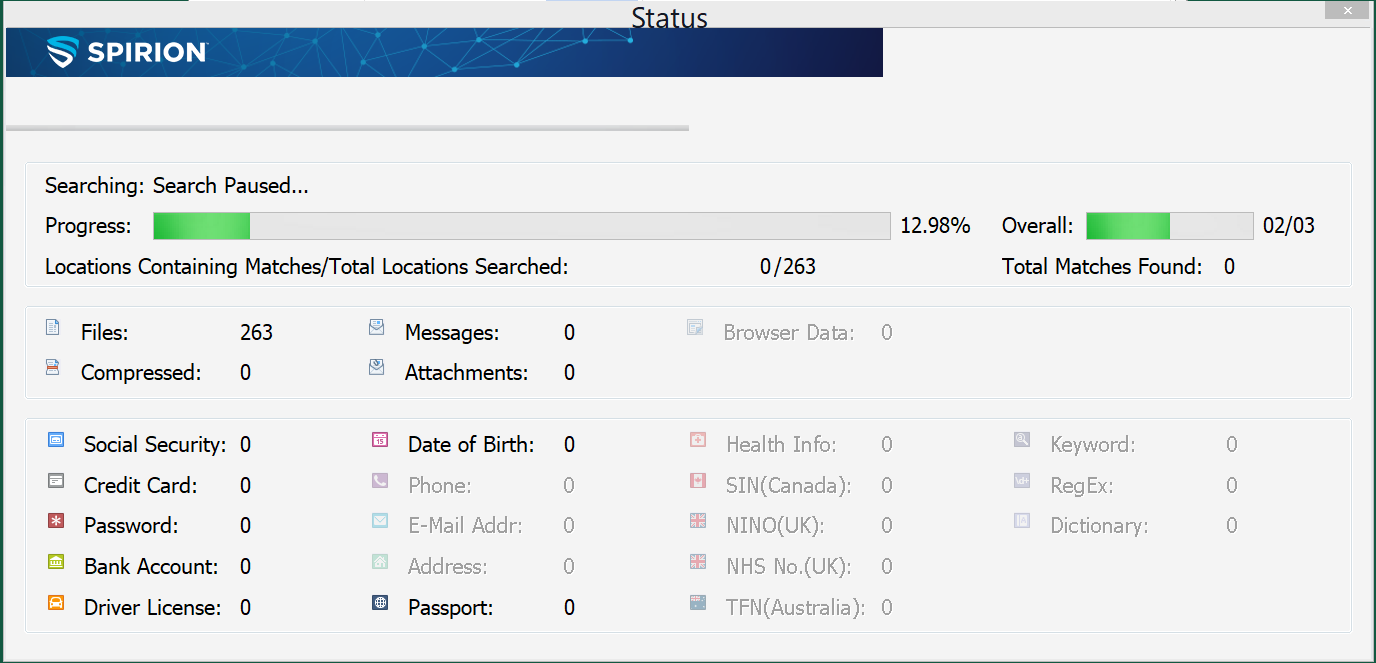
  1. You will be presented with the similar results page below after the scan completes.

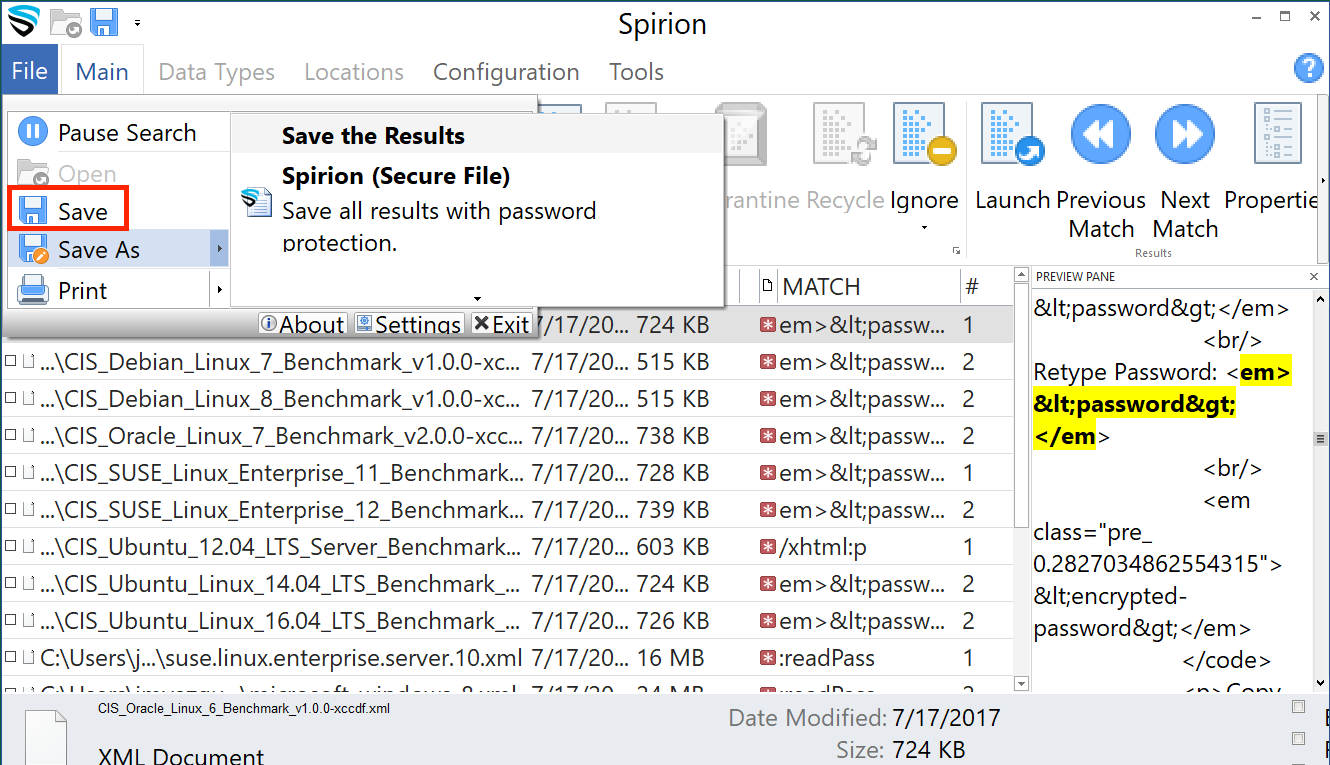
  1. The search results page is where you get to review and remediate your findings.  From the File tab, you always want to save the results for future review and to avoid another full scan next time you initiate a search.  You will be prompted for your profile password when saving the results.  All results are saved and secured using an .idf file, which can only be opened from within Identity Finder and allow you to work with your results at any time in the future. 

  1. If no results are provided, that means Identity Finder did not identify any matches during this scan and you may close the program.

Ignoring False Positive Results

The Ignore option should be utilized when a false positive result is found. A false positive is when Identity Finder marks a file as personally identifiable information (PII), when it is really not. An example is when Identity Finder picks up a campus 9 digit employee id as a social security number.  The ignore option allows users to tell Identity Finder to ignore this piece of data, and for this and all subsequent searches run on that computer.
Ignoring Identities

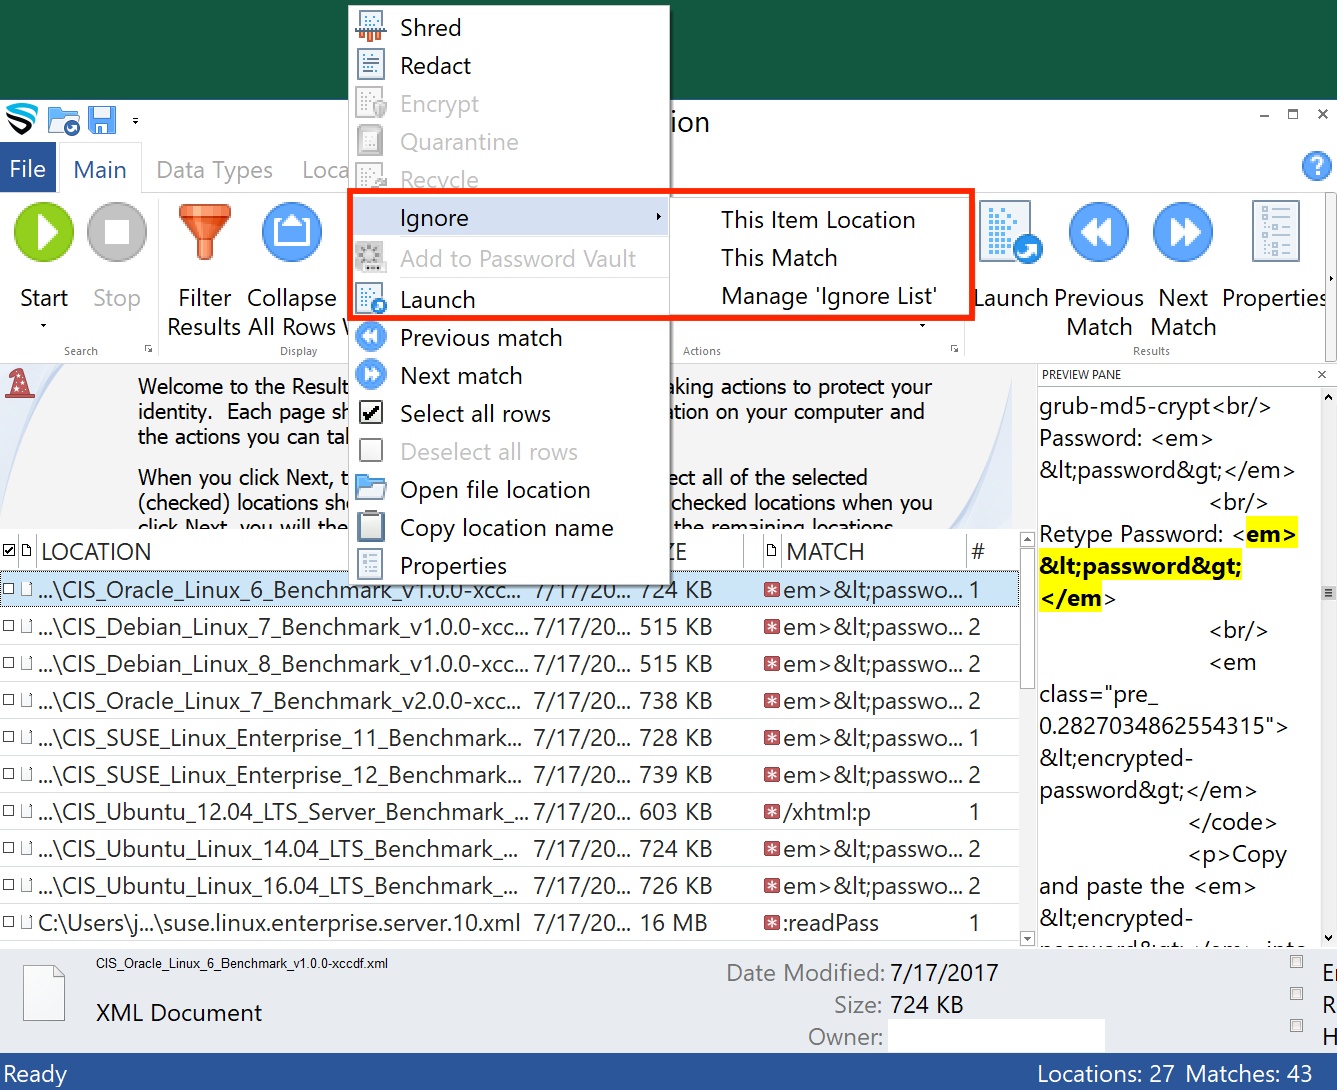
There are two ways to ignore an identity match:

  • Single click the identity match result with the left mouse button to highlight it and click the Ignore button on the Main ribbon, then highlight and left-click on This Identity Match.
  • Single click the identity match result with the right mouse button to highlight it and bring up a context menu, then highlight Ignore then highlight and left-click on This Identity Match.

Shredding Sensitive Data

If you wish to permanently remove a file that contains SSN or CCN data, select the Shred option. For files, Shred utilizes a secure United States Department of Defense wiping standard known as DOD 5220.22-M. For other locations, Shred removes the information from your computer using other appropriate methods. This option should be used when the file found is no longer needed on the user’s computer.
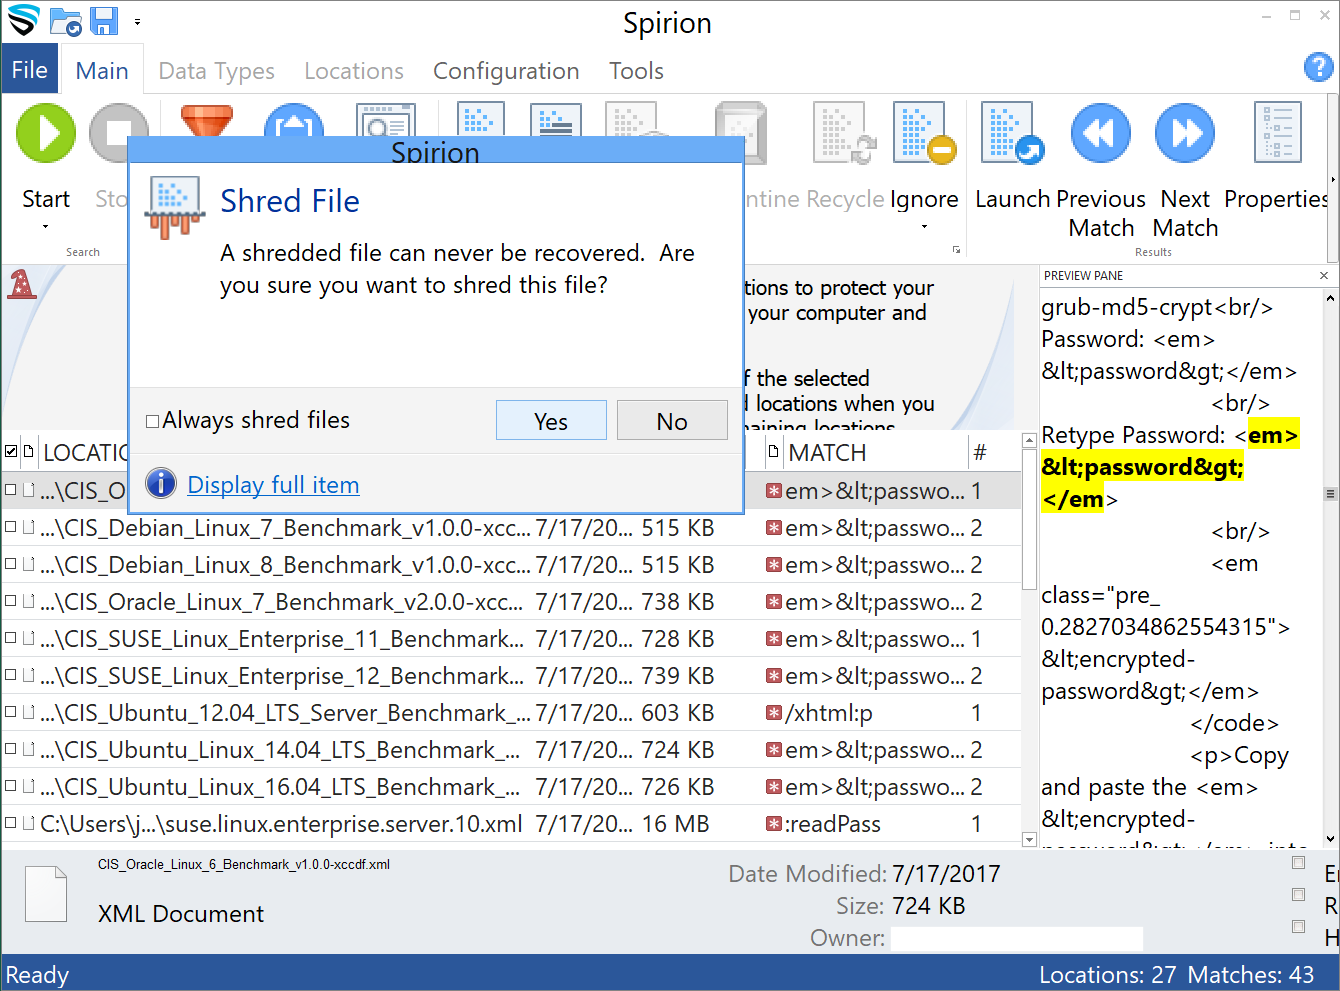
Note: It is not possible to "undo" a Shred. Shredded results cannot be recovered. Once you shred something, it is gone.

There are three ways to Shred:

  1. Click the result with the left mouse button to highlight it and click the Shred button.
  2. Click the result with the right mouse button to highlight it and bring up a context menu, then highlight and left-click Shred.
  3.  Highlight the result by clicking the left mouse button or by using the arrow keys and then press the Delete key on your keyboard.

Shred is effective at protecting your identity because it is permanent. While this means you can never get your data back, it also means a hacker or malicious intruder also cannot get this data.

Redacting Sensitive Data
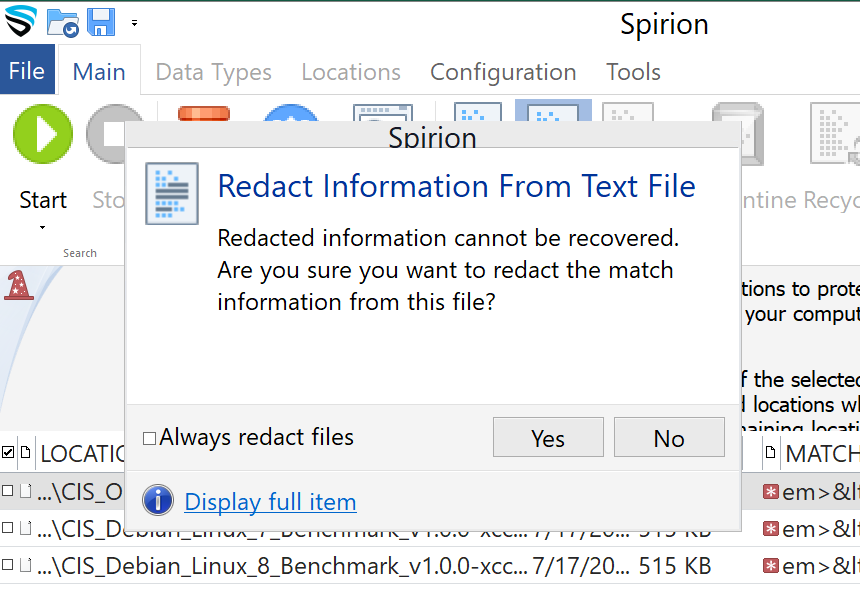
This option should be used when the file found is still needed but the PII part of the file is not. If you wish to keep the found item but remove the personal information only, you should utilize the Scrub feature. Scrub should be selected when you no longer need the personal information but want to keep the original item. This feature is also known as Redact.

Note: Scrub is only available for specific file types searched via the Files search and is not available for email or other Search Locations.

You may only scrub Office 2007 and higher files (that is, *.docx, *.xlsx, *.pptx) and text files (*.txt, *.log, *.ini).

There are two ways to Scrub a location:

  1. Click the result with the left mouse button to highlight it and click the Scrub button.
  2. Click the result with the right mouse button to highlight it and bring up a context menu, then highlight and left-click Scrub.